
ALPS ALPINE RS-1000
About the RS-1000
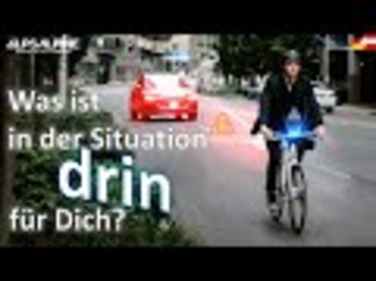
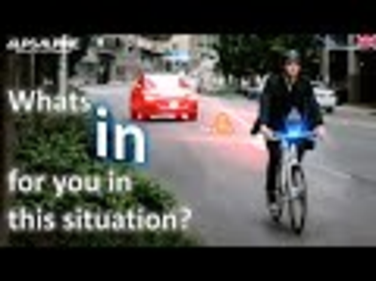
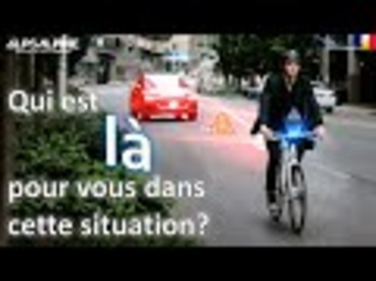
The RS-1000 digital rear-view mirror sets a new standard for safe cycling. The RS-1000 continuously monitors the traffic behind and sends the real-time digital view to a smartphone mounted in the rider's field of vision.
It goes without saying that the rear light is approved by the Federal Motor Transport Authority and complies with the German Road Traffic Licensing Regulations (StVZO).
It offers protection against dust and rain (IP55 and IP57).
The RS-1000 is easily attached to the seat post or luggage rack using a quick-release fastener.
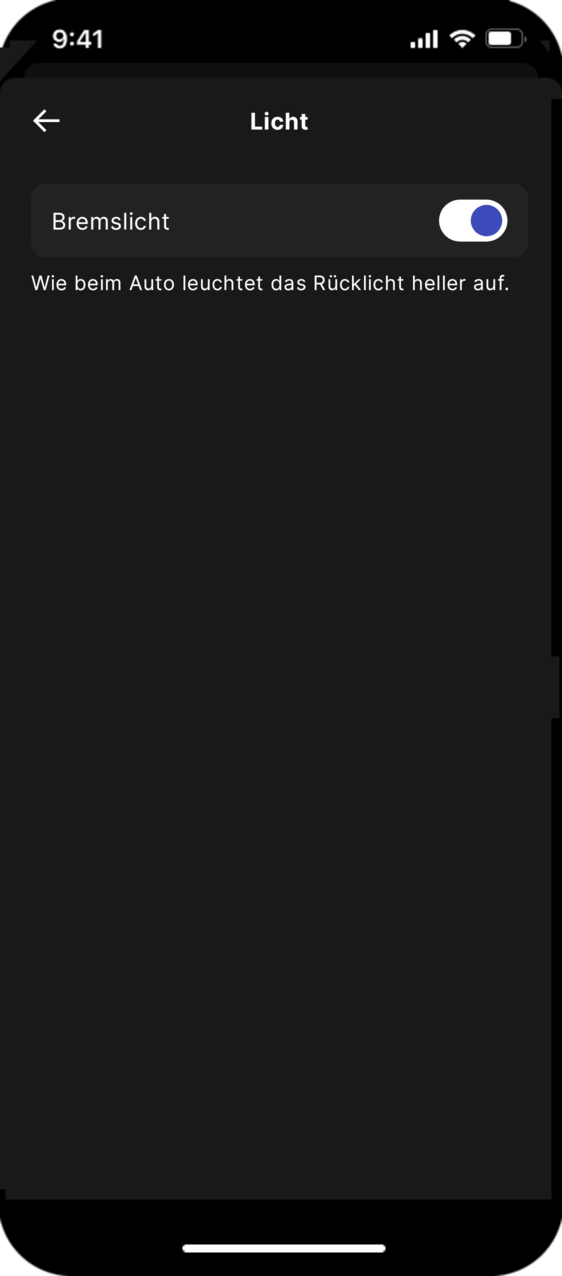
The super-bright rear light integrates a multi-stage brake light, just like in the latest generation of cars.
It includes a dashcam with wide-angle function (150°).
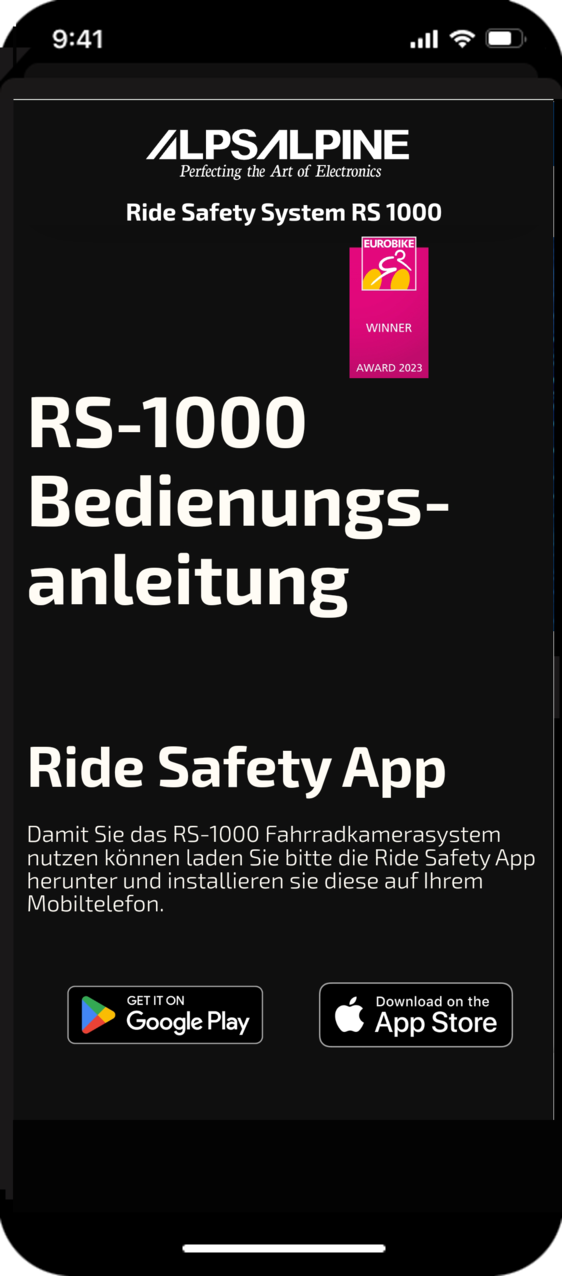
The camera comes with the free Ride Safety app for Android and iOS. Images are transmitted to the app wirelessly via WiFi. The most important features are:
- fast approach,
- close approach,
- close overtaking.
|
Google Play: |
https://play.google.com/store/apps/details?id=com.alpsalpine.ridesafetyapp |
|
App Store: |
https://apps.apple.com/us/app/ride-safety/id6449769103 |
Install app


After installation, the following welcome screen appears:

Activate mobile hotspot
This can usually be found under Settings > Connections > Mobile hotspot and tethering.
This data is required for pairing.
Continue with Grant authorizations.
Granting authorizations
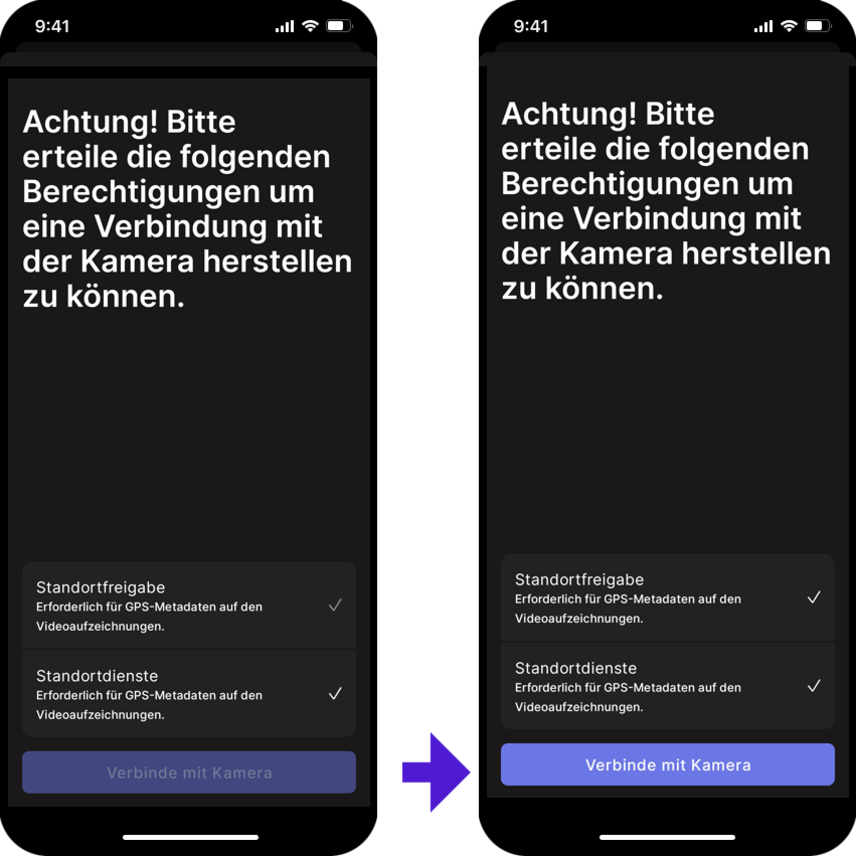
Continue with Activate pairing mode.
Activate pairing mode
To pair the camera with the smartphone, the camera must be in pairing mode.
In pairing mode, the vertical and horizontal LEDs flash alternately.
Pairing mode is activated in the factory settings of a new camera and does not need to be set.

Continue with Add camera to network.
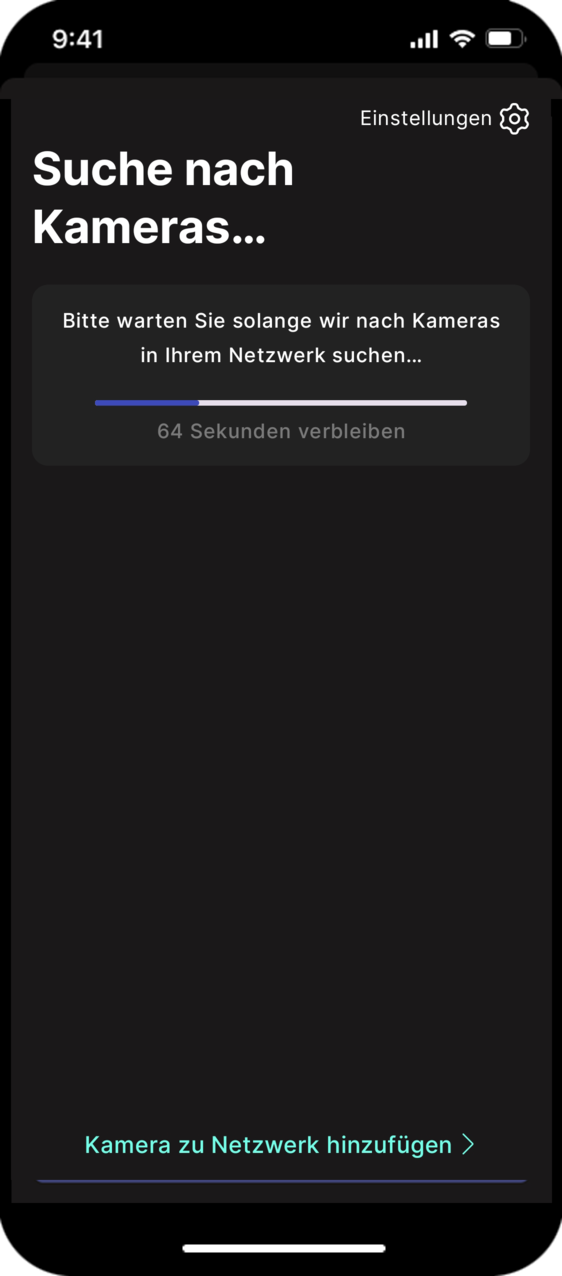
Add camera to network
|
|
Continue with Pair camera and smartphone using the QR code.
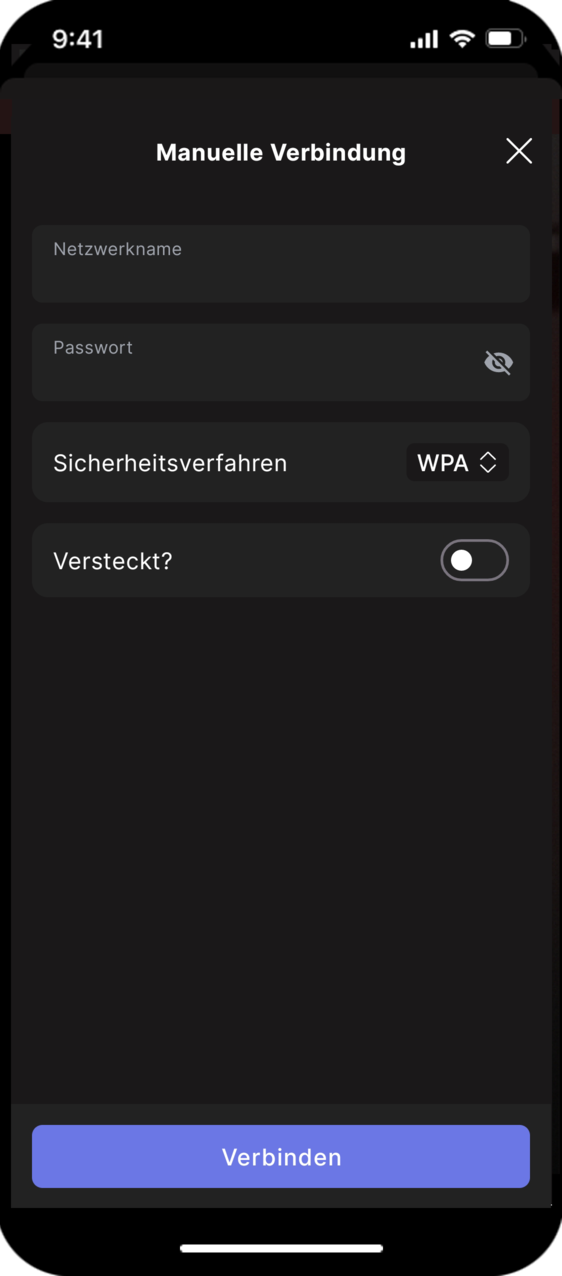
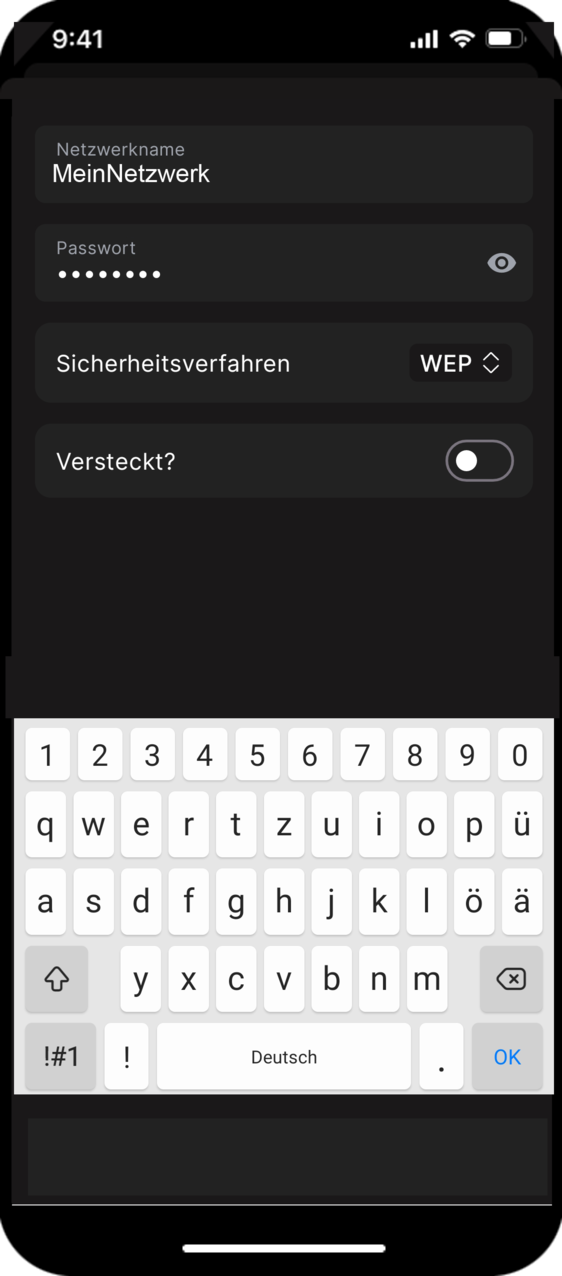
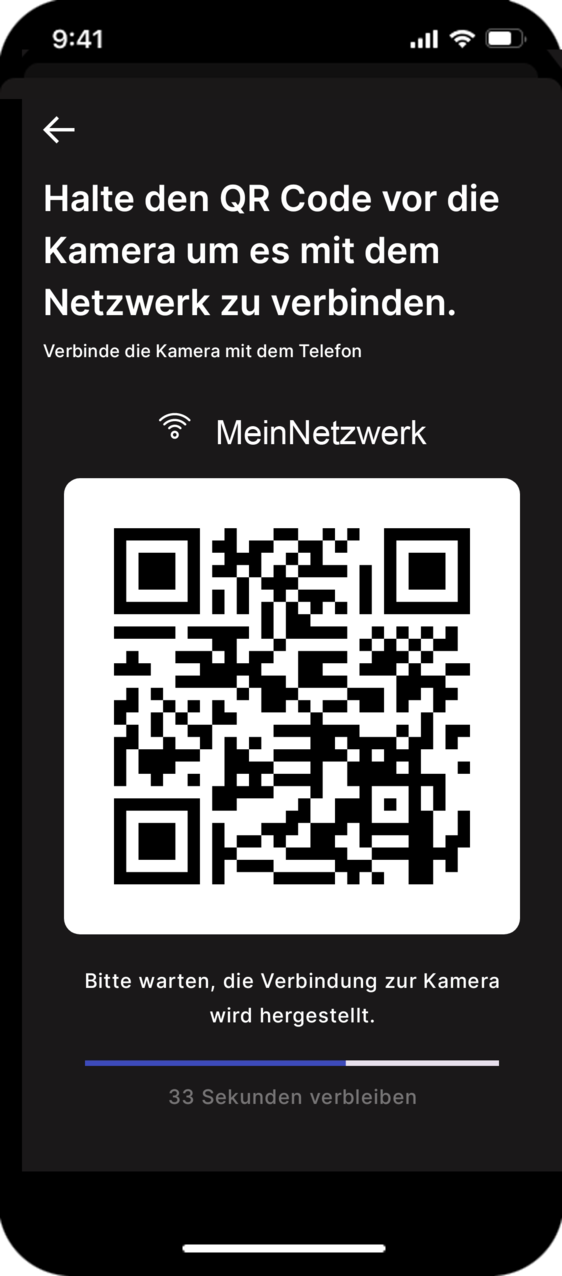
Pair camera and smartphone using the QR code
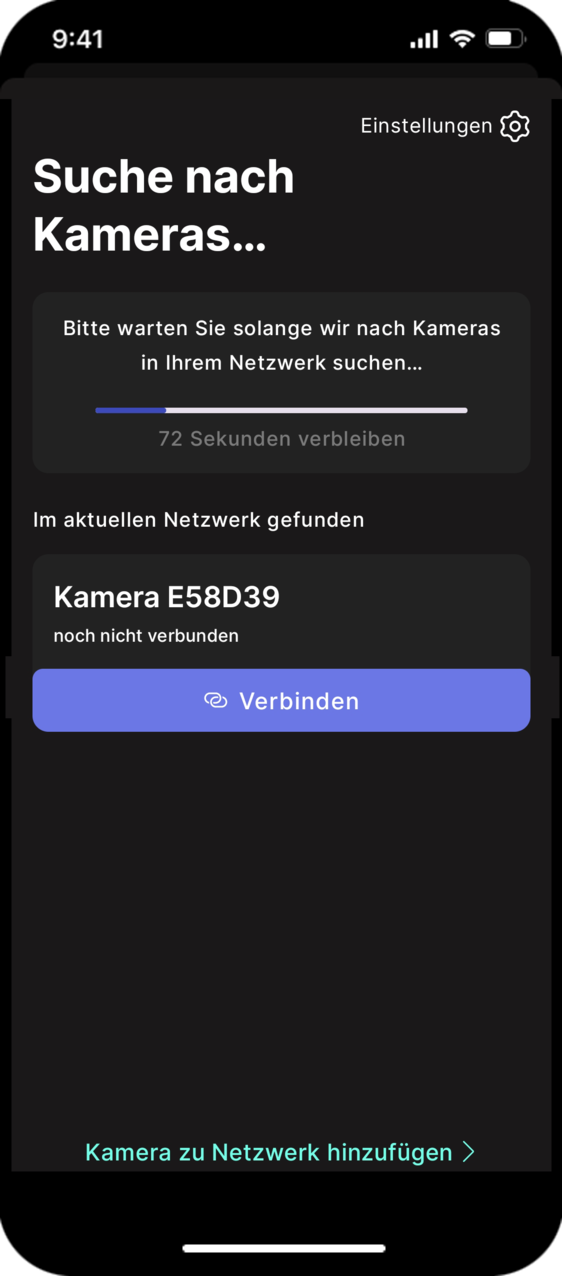
After entering the hotspot data and activating Connect, a QR code appears.
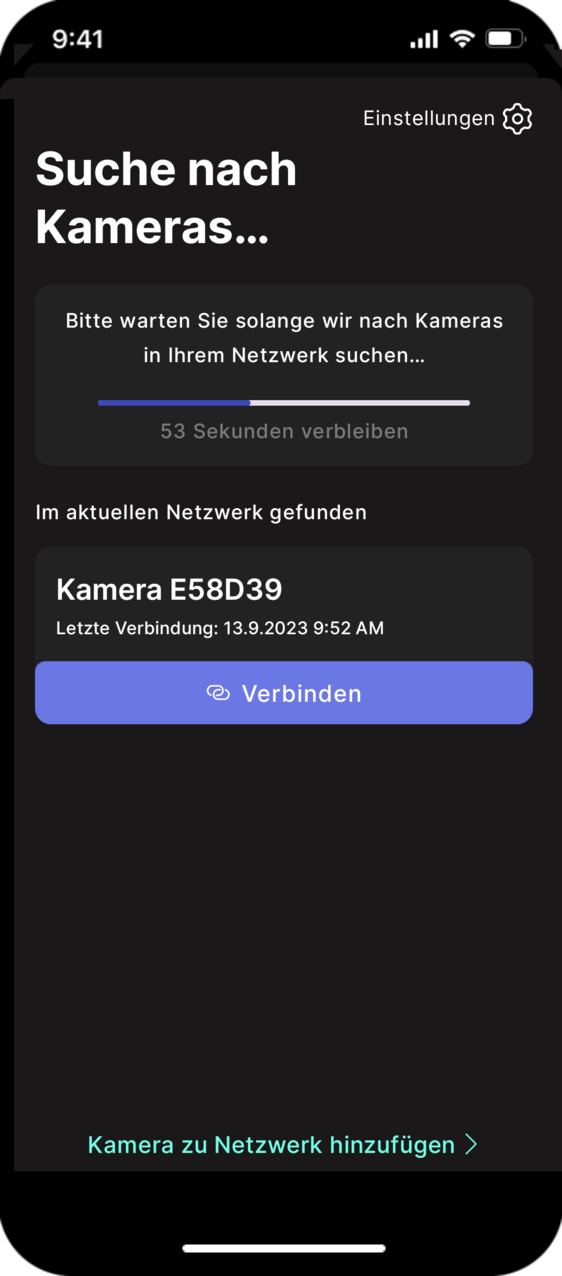
A found camera is displayed on the smartphone:
|
If the camera switches to pairing mode during the search (vertical and horizontal LEDs light up alternately), the connection did not work.
|

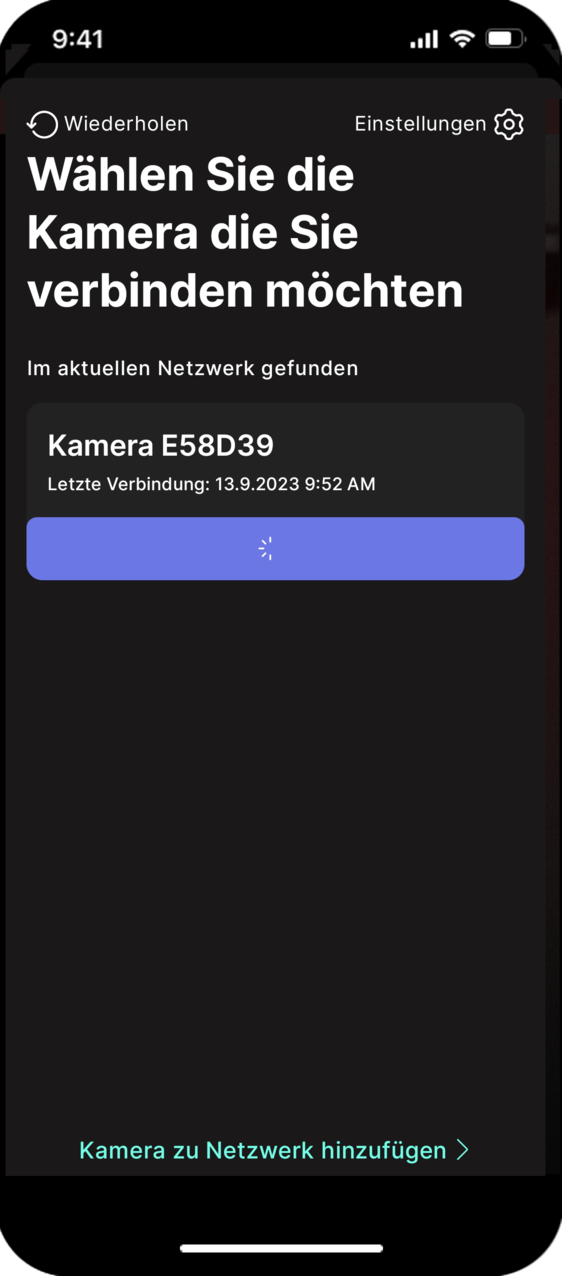
Continue with Creating the rear-view mirror function.
Creating the rear-view mirror function
One or more cameras can be found during pairing.
 switch the rear light on the RS-1000 on or off.
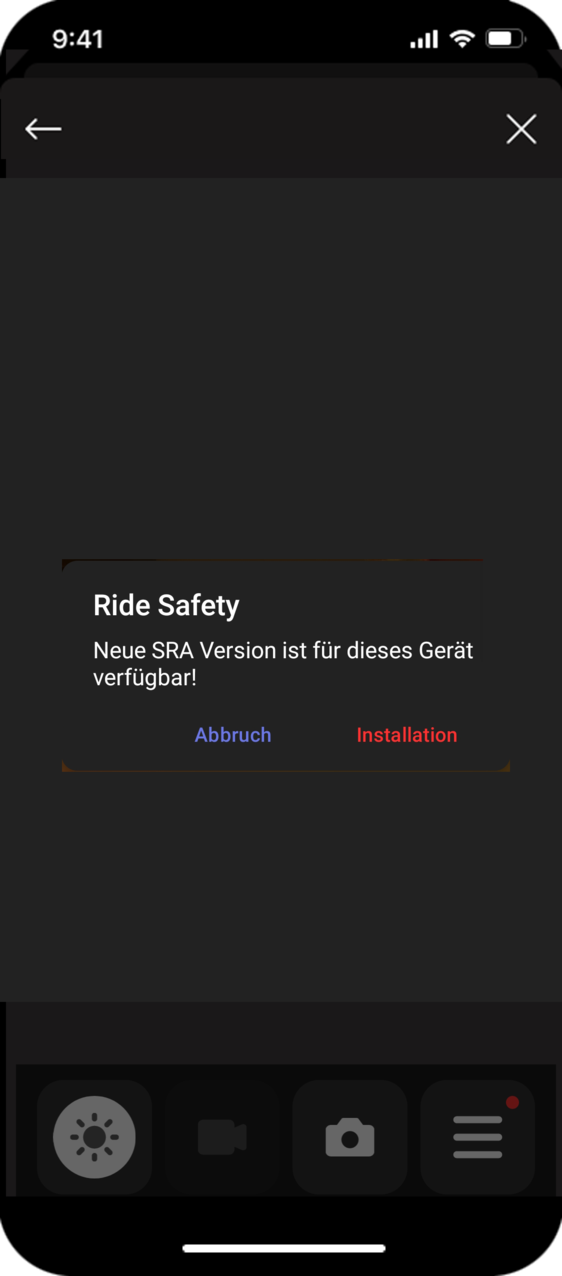
Install SRA
A key functional element of the RS-1000 is the SRA, the Situational Risk Assessment of dangerous situations while driving. For the settings, see here: Settings for the Situational Risk Assessment.
After installing the app, the SRA is not yet installed. The app will draw your attention to this.
Switching on and off
Switch on the camera

Switch off the camera
Key functions
|
Camera status |
Keystroke |
Consequence/function |
|
From |
Longer than 3 seconds |
LEDs light up, camera is powered up. |
|
From |
Shorter than 3 seconds |
No function, protection against accidental actuation. |
|
A |
Longer than 3 seconds |
The upper LED flashes after release and a tone sequence sounds. The camera shuts down completely. |
|
A |
1 x short |
Camera goes into standby. |
|
In standby |
1 x short |
Camera is retrieved from standby. |
|
Off and in the charging process |
1 x short |
Camera is raised. |
Light patterns and warning tones
|
Light pattern |
Consequence/function |
|
All LEDs light up: |
Camera is raised. |
|
All LEDs light up during the charging process: |
Camera is fully charged. |
|
The top 3 LEDs light up: |
Normal operating status, the camera is ready to drive. |
|
The upper LED flashes: |
Change in system status (e.g. during shutdown, update or event recording). |
|
The horizontal and vertical LEDs light up alternately: |
Camera is in pairing mode. |
|
The illuminated LEDs circle: |
Connection established after scanning the QR code. |
|
All LEDs flash 3 x short, 3 x long, 3 x short: |
SOS |
Switching on the network camera
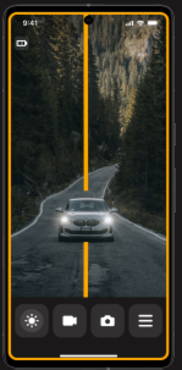
InRide functions
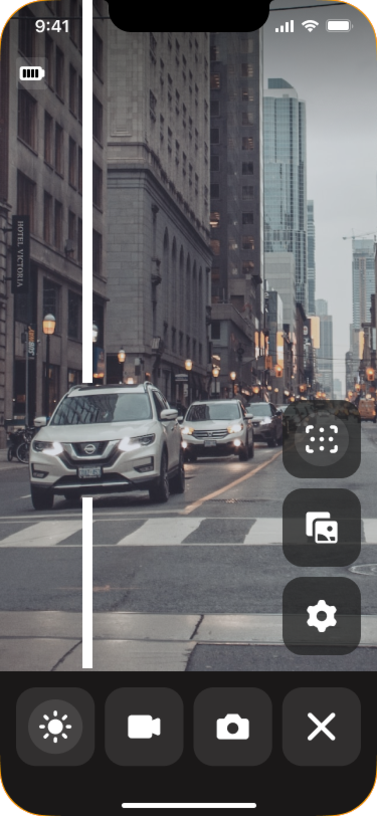
While the camera is transferring the image to the smartphone, the following functions are available:

|
1 |
Switching the camera light on and off; here: switched off |
|
2 |
Start and stop video recording: |
|
3 |
Take a screenshot of the camera image |
|
4 |
Expand menu |

|
1 |
Switching the camera light on and off; here: switched on |
|
2 |
Close menu |
|
3 |
Open settings |
|
4 |
Gallery of saved incidents, highlights and snapshots. The saved incidents are the 20-second videos that are generated for each warning. |
|
5 |
Picture in picture (only for Android) |
|
6 |
Switch SRA (situational risk assessment) on and off |
Settings
|
The software for the camera is constantly being developed. The menu illustrations here may therefore differ in detail from the menus on the smartphone.
|
 open.
open.
Overview of the settings:
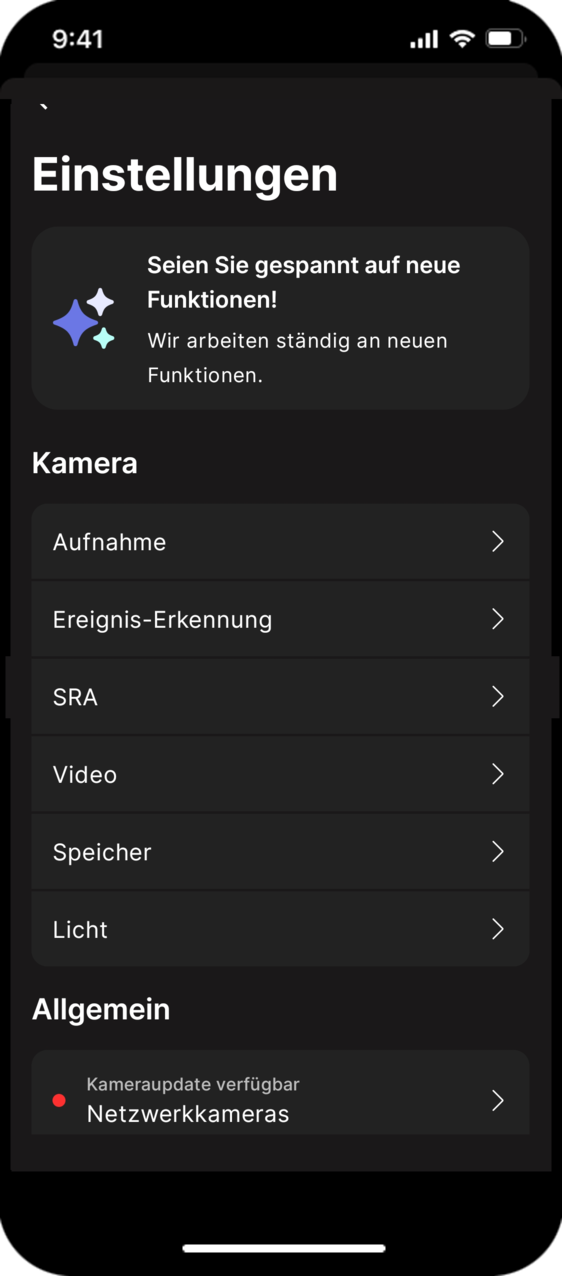
The settings under "Camera" are only visible if a camera is connected.
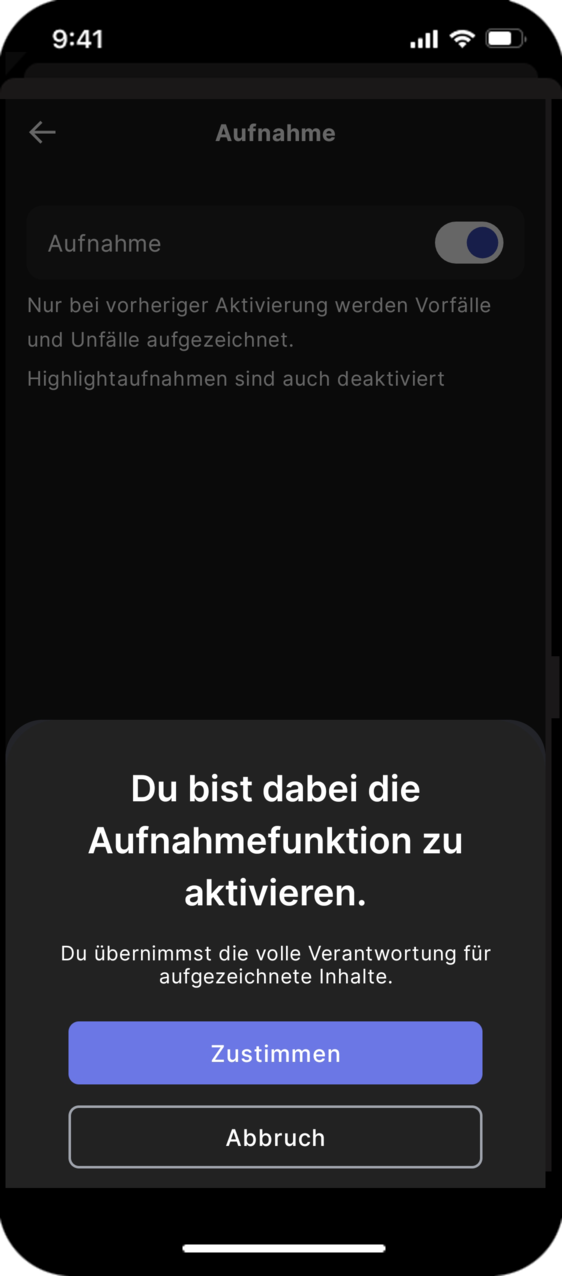
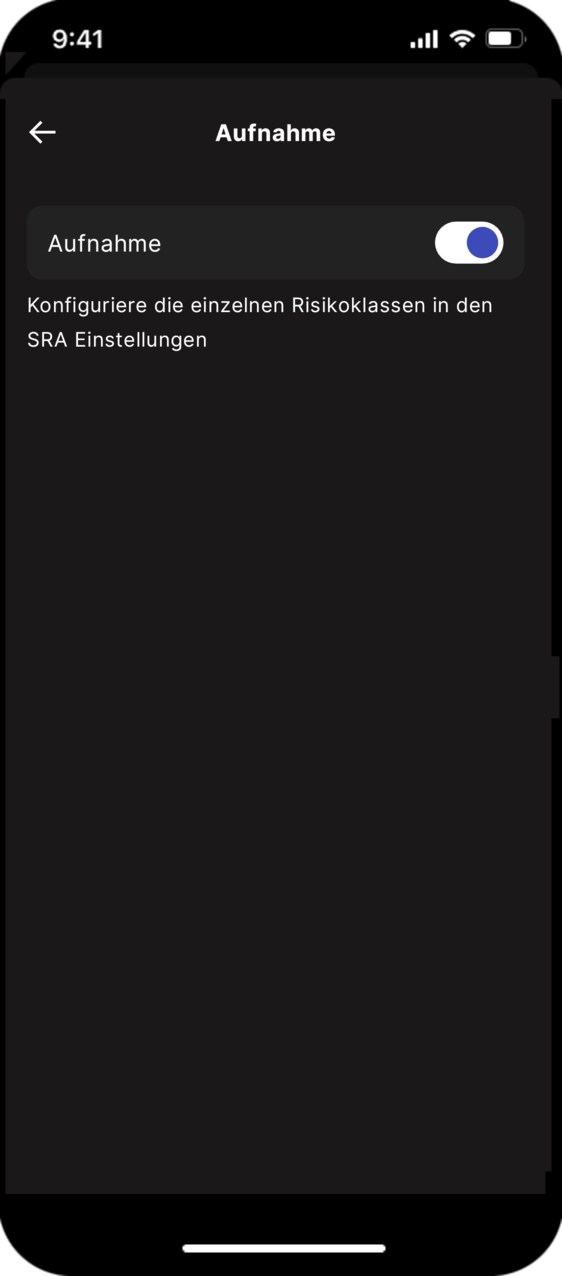
Recording
You can make video recordings while driving.
|
The content of the recordings is the responsibility of the user. It is therefore necessary to give consent for the assumption of responsibility.
|
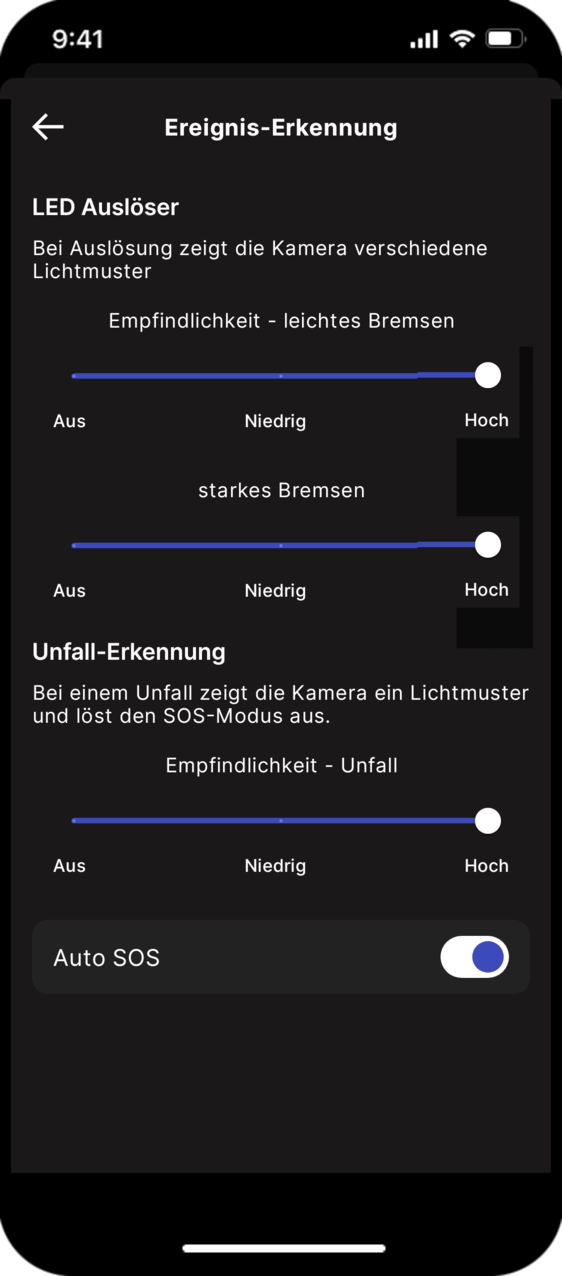
Event detection
The events can be followed by light patterns and signals that can be set in this menu.
|
Events |
Light patterns and signals |
|
Light braking |
The LEDs light up brighter. |
|
Heavy braking |
The LEDs flash. |
|
Accident: sudden chaotic movement |
Several rapid beeps and LEDs light up synchronously. |
|
SOS alarm: occurs after a one-minute standstill following the "accident" event |
Signal tones: 3 x slow, 3 x fast, 3 x slow and synchronized flashing LEDs. |
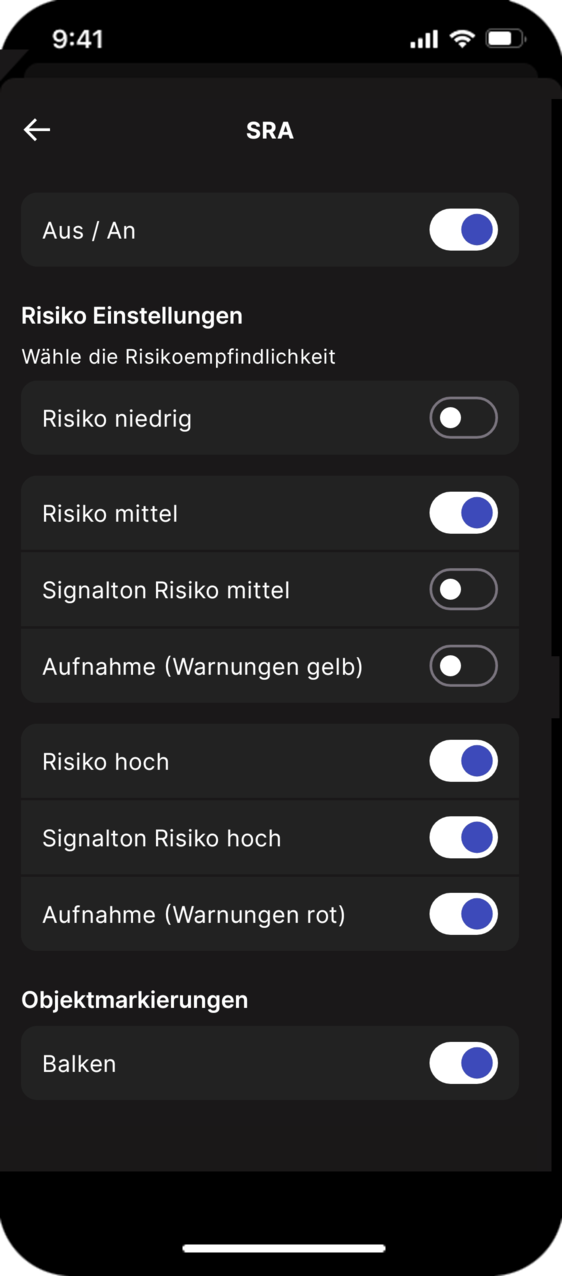
SRA: Situational risk assessment
SRA =Situational Risk Assessment
After installing the app, the SRA is not yet installed. For installation, see Install SRA.
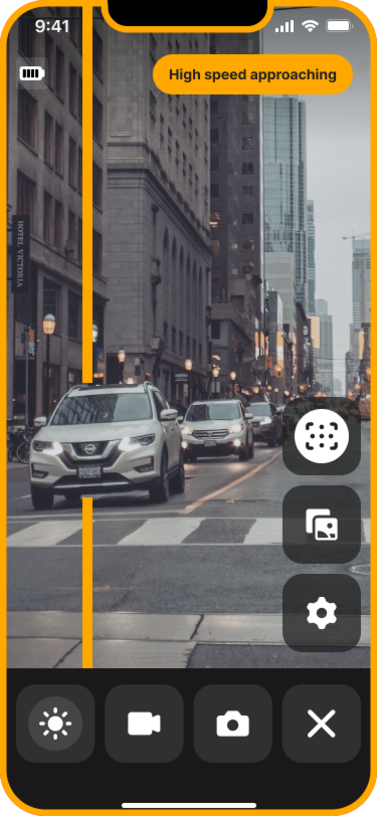
The SRA also distinguishes between 3 risk classes, to which the following colors are assigned:
|
Risk class |
Color (screen border and message) |
|
Low |
White |
|
Medium |
Yellow |
|
High |
Red |
|
The following setting Object markers - bars must be deactivated for the recording function.
|
|
No recordings are possible when the bar is activated.
|
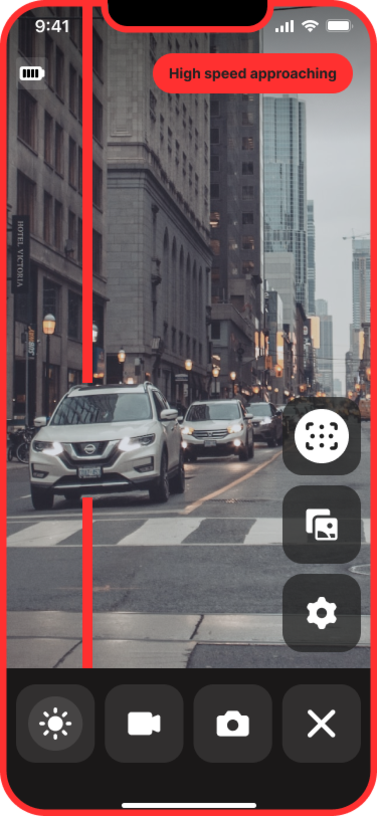
If the camera detects a hazard according to the 3 hazard types, a corresponding text message appears and the screen is given a colored border corresponding to the risk class (white/yellow/red).
|
English text message |
Meaning |
|
Fast approaching |
Fast approach |
|
Near behind |
Close approach |
|
Close side passing |
Close overtaking |
|
|
|
Video
The settings for video recordings:
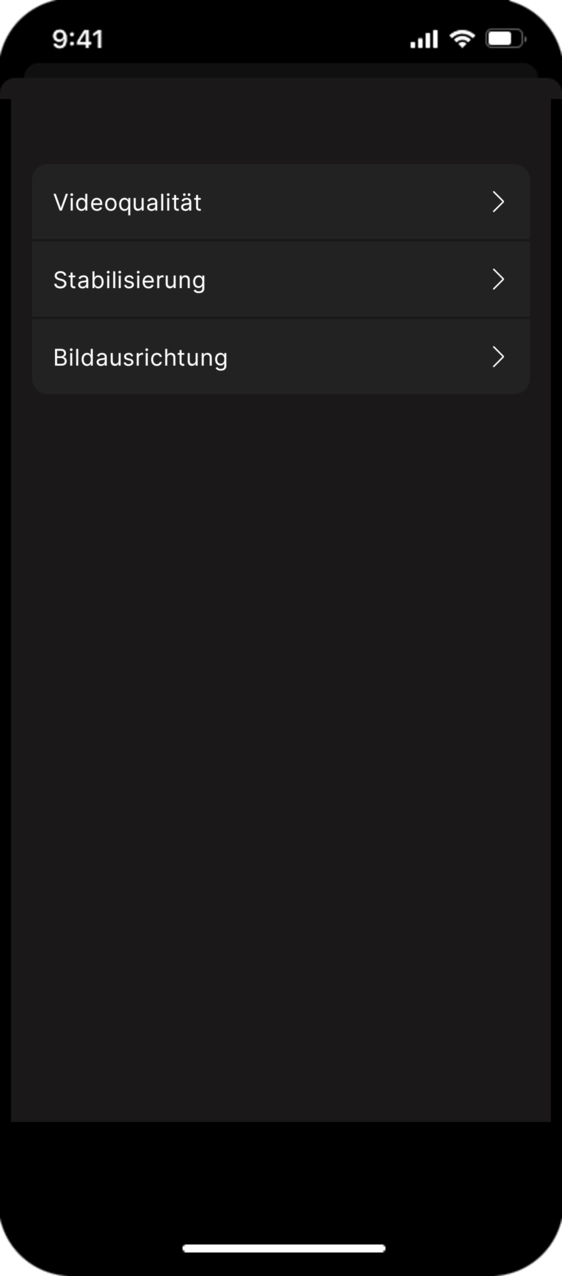
Video quality
A higher resolution ("p") and refresh rate ("fps") make the image clearer, but increase the file size and therefore the memory requirements.
Recommended: 480p 30fps.

Image stabilization
Select the sensitivity level for the image stabilization sensor:

Image alignment
Set the orientation of the camera image on the smartphone:

|

|

|
The delay setting is only visible in the Auto image alignment setting.
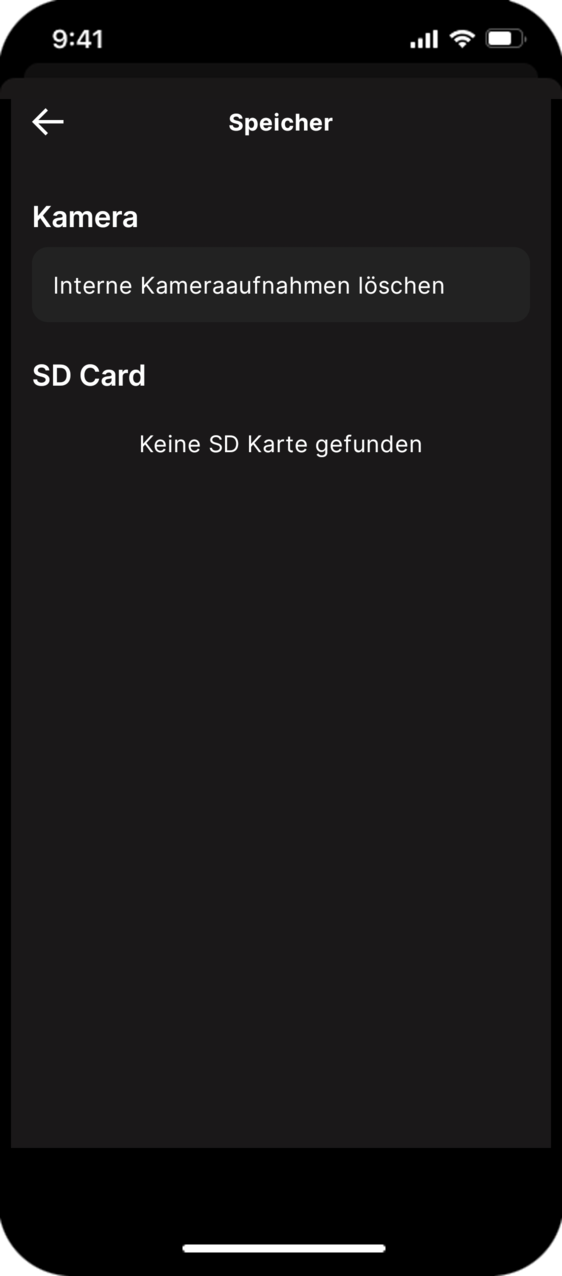
Memory
The camera has an internal memory and a slot for an SD card.
When an SD card is inserted, you will be prompted to format it
The Memory menu is used to delete saved data.
Light
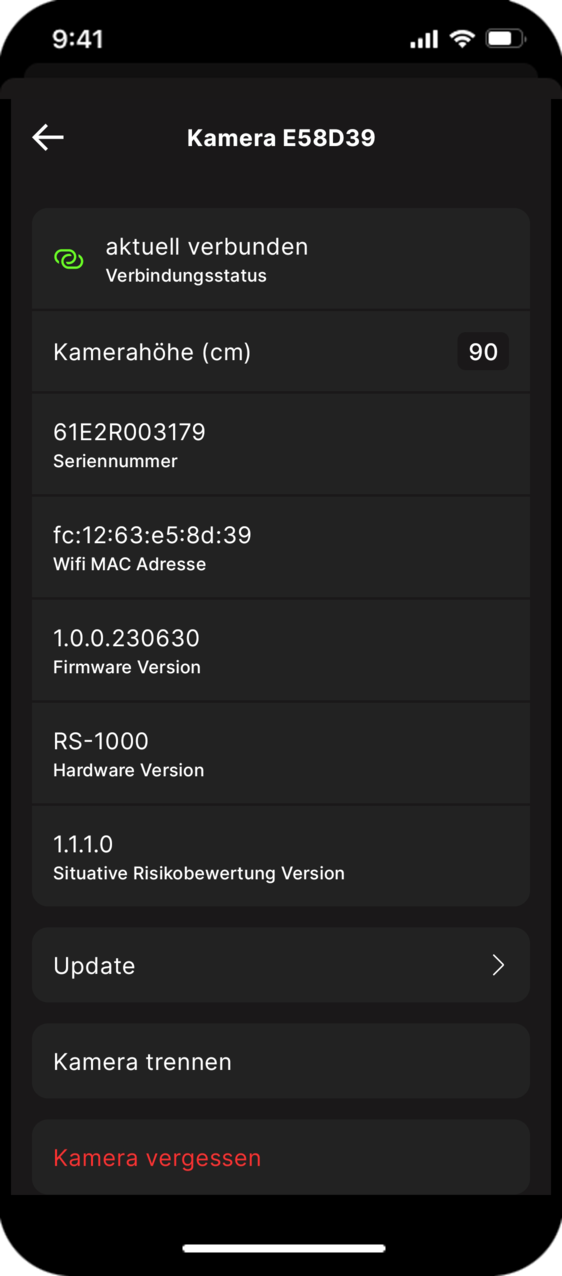
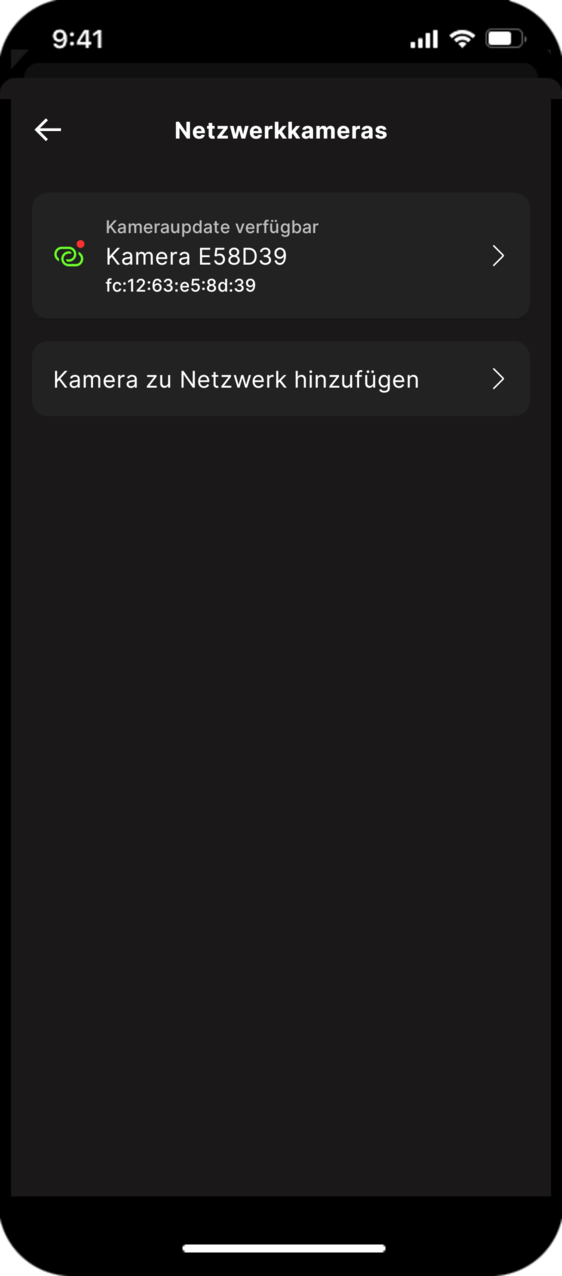
Network cameras
Connected cameras are listed with the following information and management options:
Tutorials
In this menu you will find links to tutorials at .
|
Language |
Unpacking and installing the device |
|
EN |
|
|
EN |
|
|
FR |
|
|
NL |
|
|
DK |
|


|
Language |
Pairing and commissioning |
|
EN |
|
|
EN |
|
|
FR |
|
|
NL |
|
|
DK |
|


|
Language |
Pairing and commissioning |
|
EN |
|
|
EN |
|
|
FR |
|
|
NL |
|
|
DK |
|


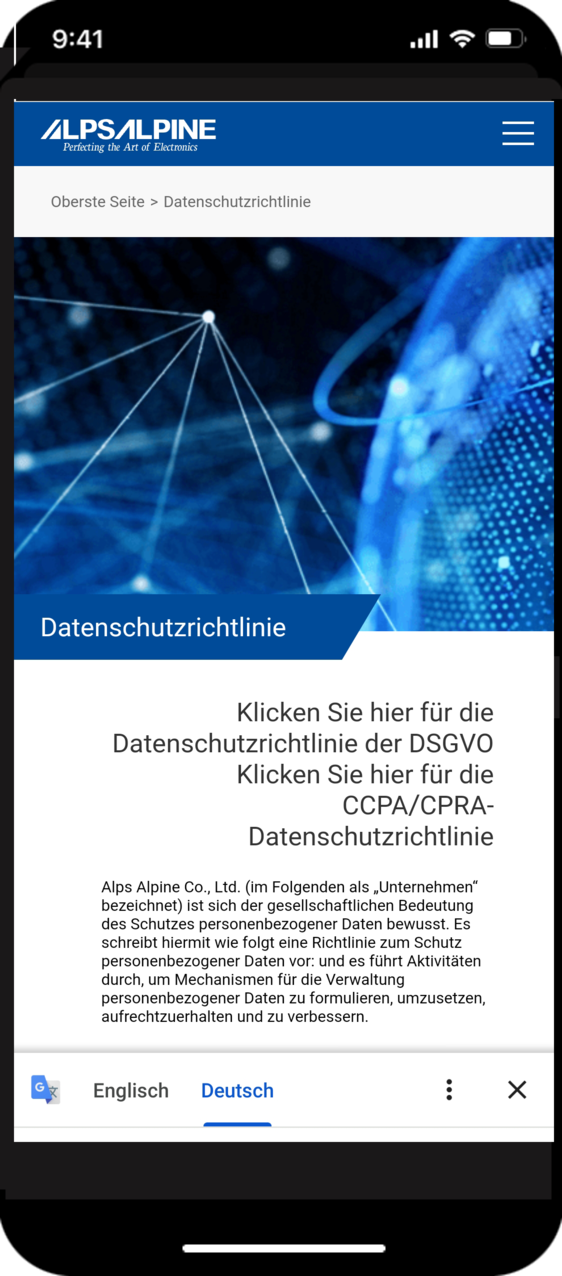
Data protection
In this menu you can view ALPS ALPINE's privacy policy.
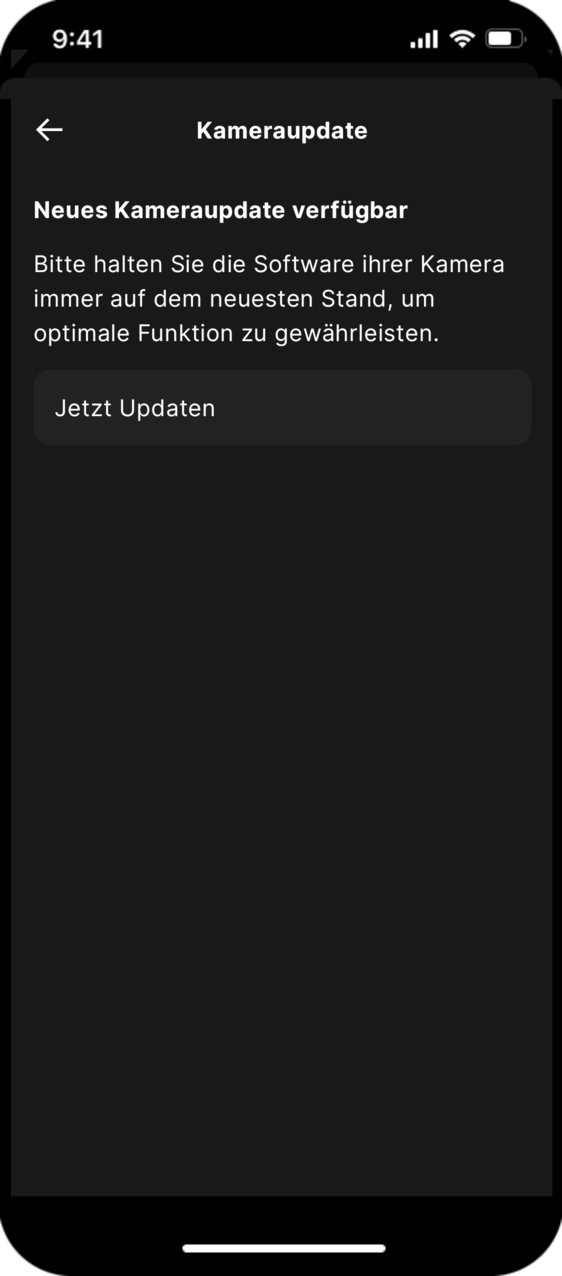
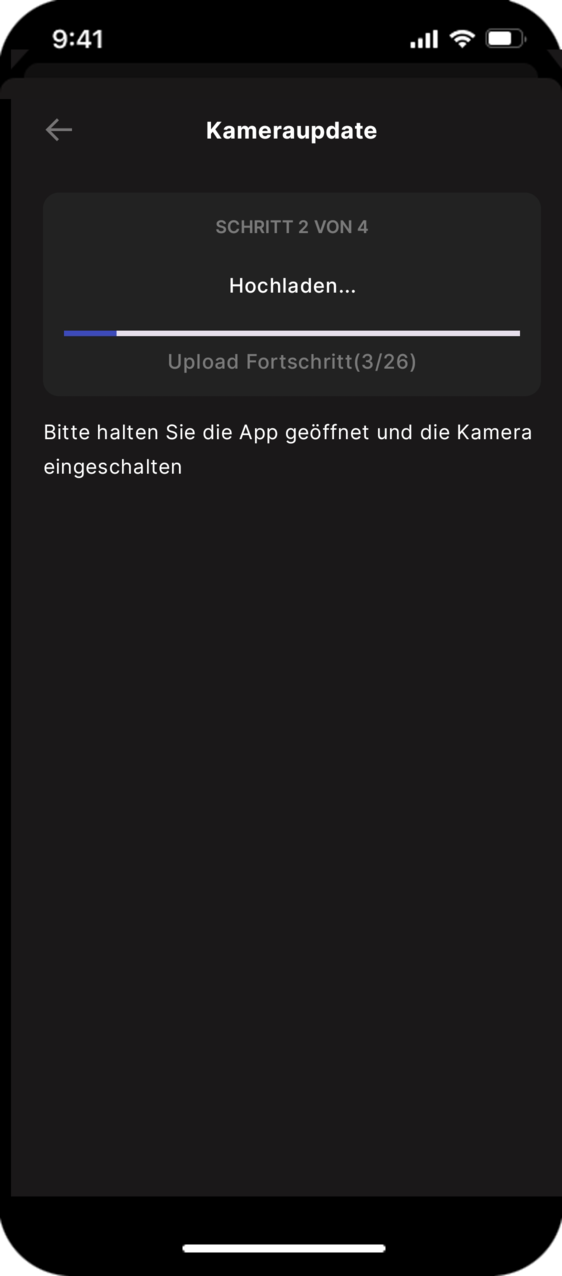
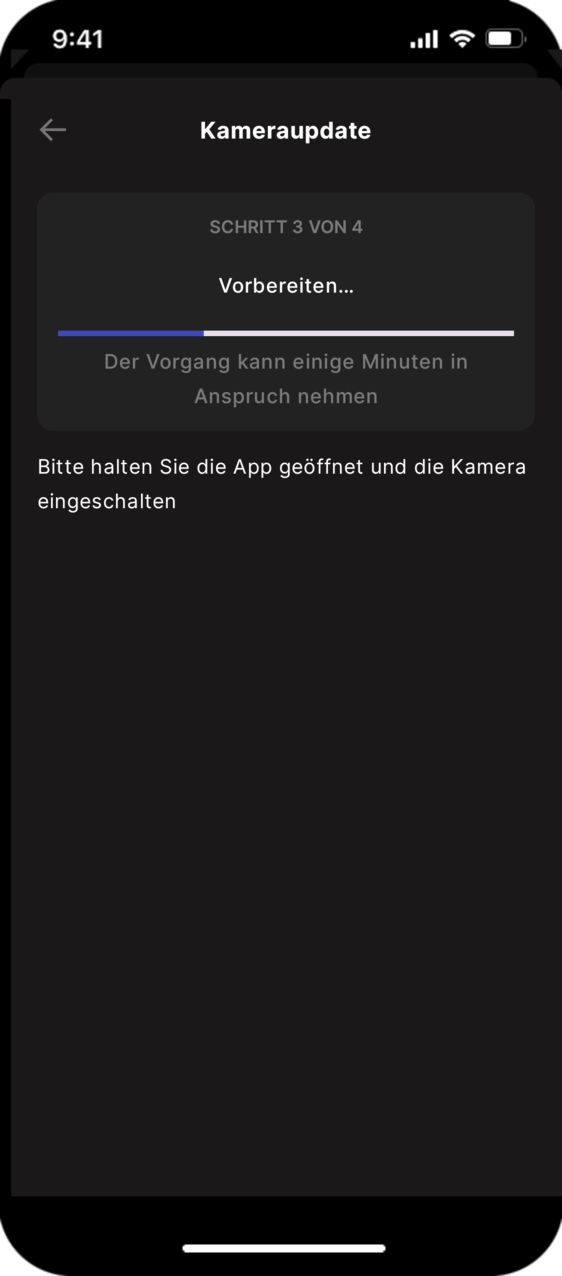
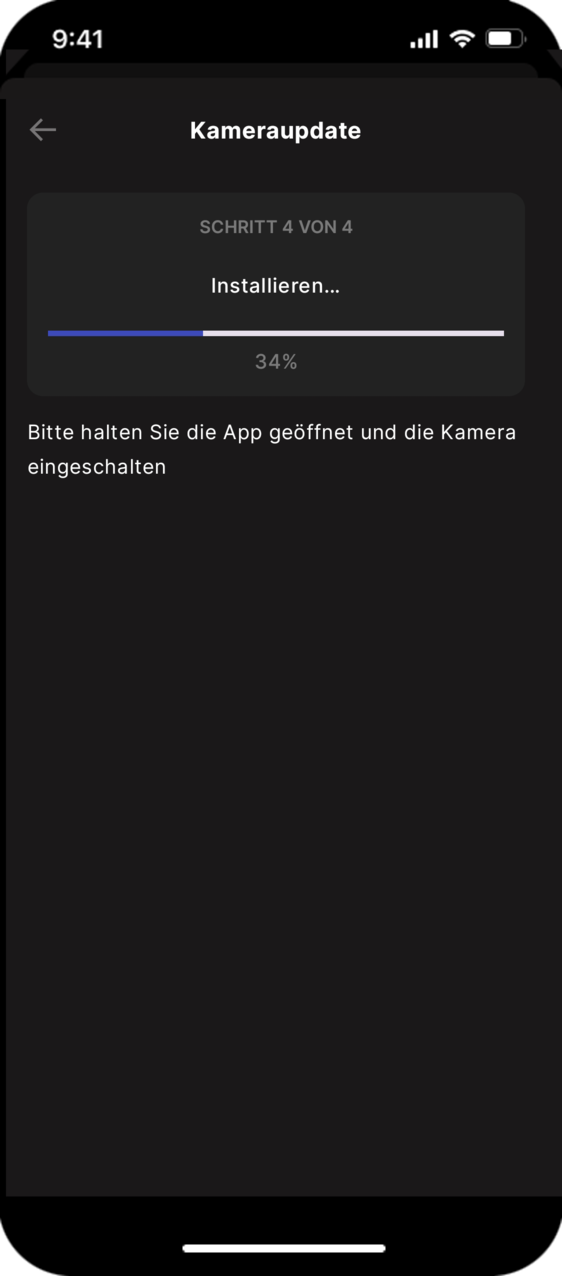
Performing a firmware update
The Ride Safety app automatically detects whether the connected cameras are still up to date. If a firmware update is available, a message is displayed.
|
|
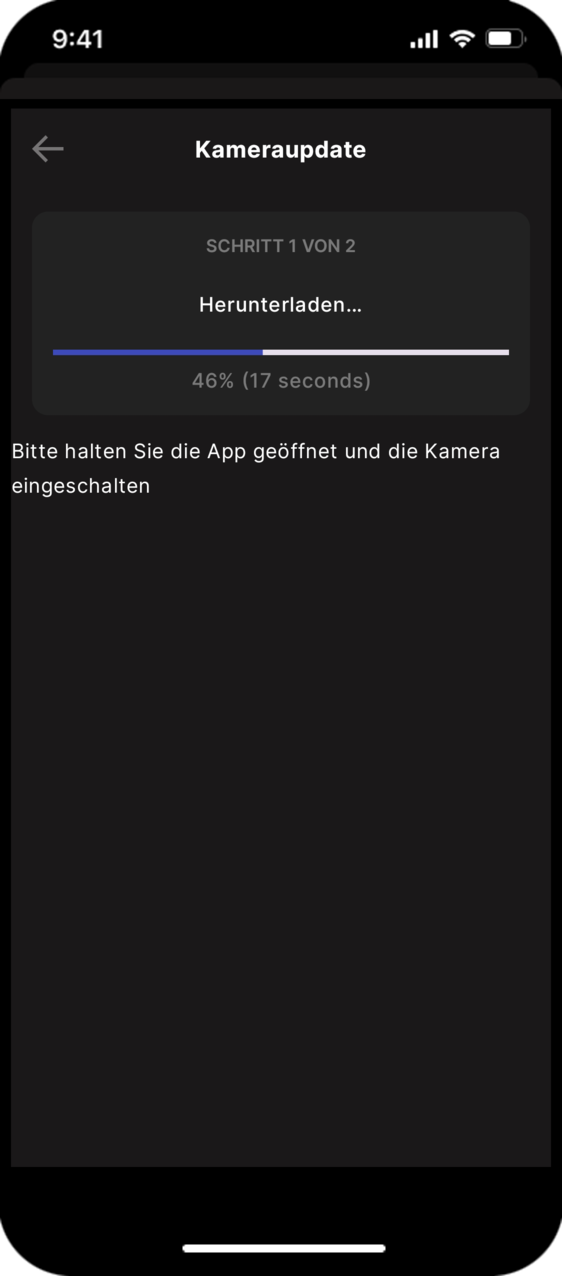
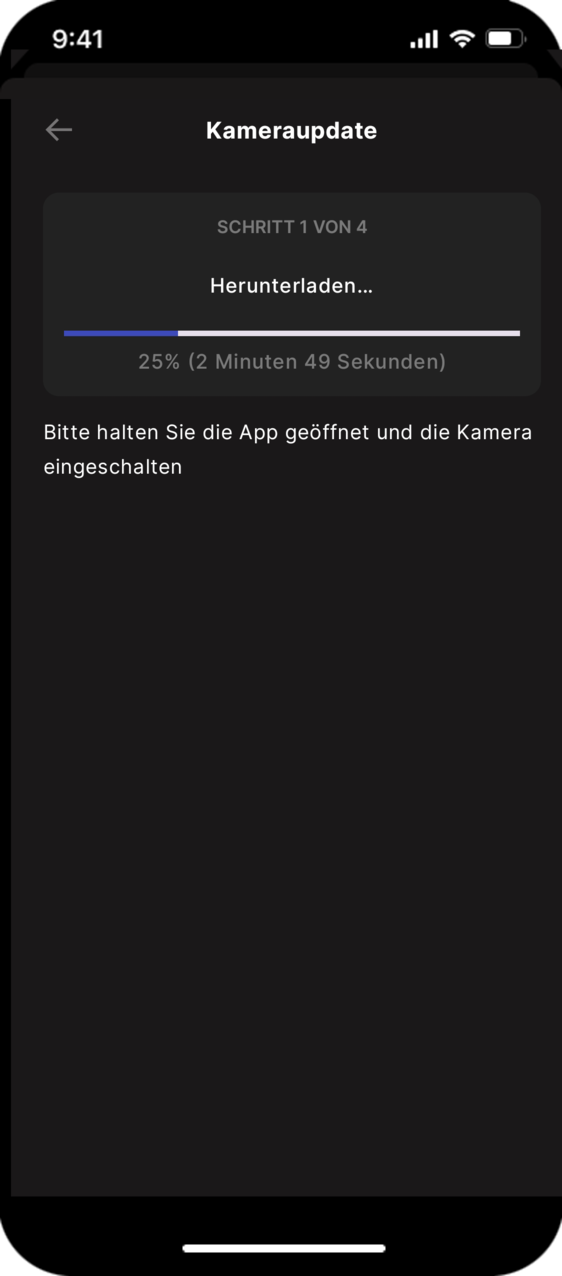
A firmware update is approx. 600 MB in size. We recommend connecting the camera and smartphone to your home network for the update instead of the hotspot.
However, to be able to use the hotspot again after the update, the home network connection must be cut again, as the camera always connects to the strongest known network.
|
|
|
|
|

|
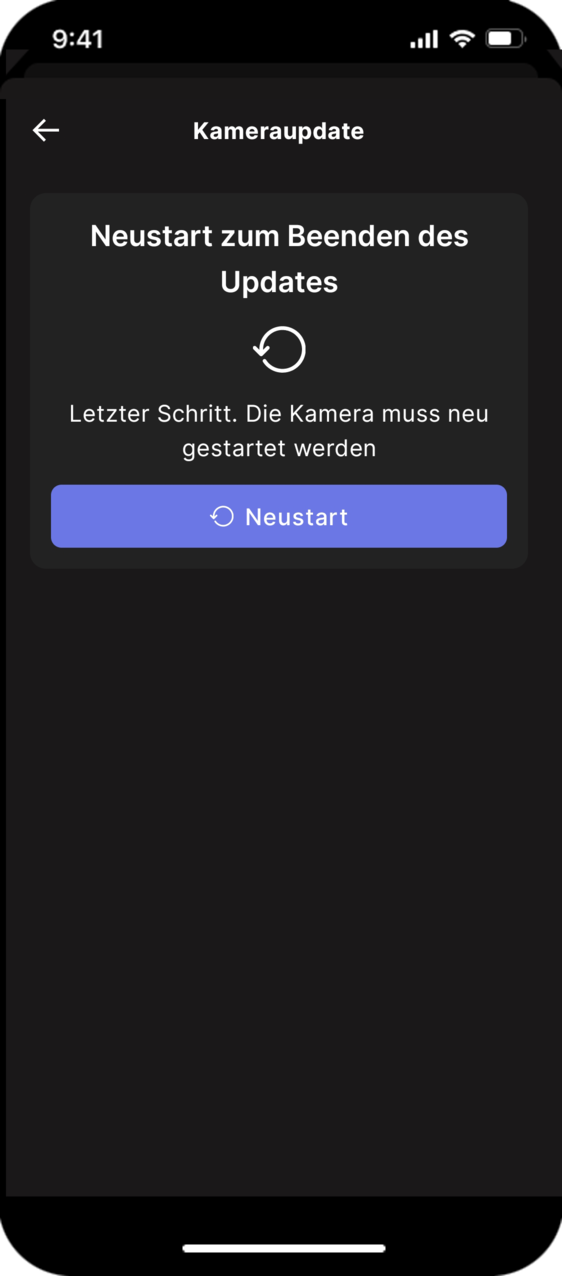
A success message appears after successful installation:

Mounting the RS-1000 on the bike
Security
The RS-1000 is intended for use on bicycles in road traffic. It can be mounted on the seat post or luggage rack and serves as a digital rear-view mirror on the handlebars. The system records the traffic behind and transmits the image to a smartphone in the rider's field of vision.
|
This product complies with the specified limits for radio frequency radiation from portable devices in an uncontrolled environment and is safe for intended use as described in this manual. Further reduction of radio frequency exposure can be achieved by keeping the product as far away from the body as possible.
|
|
|
|
High accident risk if the rear light function fails at dusk or in the dark
Risk of serious or even fatal injuries!
Never ride without an illuminated rear light.
Charge the battery as soon as the RS-1000 indicates a low battery level.
Keep the cover cap firmly closed over the connections at all times to prevent the ingress of water and dirt.
|
|


Description
Scope of delivery
Material required
Front page

|
1 |
Bracket (see below) |
|
2 |
Housing |
|
3 |
Light strips on the four sides (2 LEDs each) |
|
4 |
Acoustic signal output |
|
5 |
Microphone |
|
6 |
On and off switch |
|
7 |
Camera |
|
8 |
Cover cap for USB port, memory card and reset button |
Back and bracket

|
1 |
4× M5 thread for mounting with 2 screws (not supplied) on the rear light bracket of the bike, screw spacing 50 or 80 mm |
|
2 |
DC IN -/+ 12 V |
|
3 |
Adapter plate |
|
4 |
4 mm screws for fastening the adapter plate |
|
5 |
movable mounting bracket |
|
6 |
Rubber adapter |
|
7 |
Rigid mounting bracket |
|
8 |
Hexagon socket screw 4 mm for attaching the bracket to the seat post |
|
9 |
Hexagon socket screw 4 mm for angle adjustment |
|
10 |
Pivot frame holder |
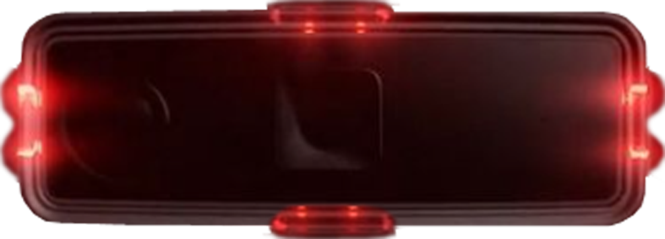
Light strips

|
1 |
Illuminated LEDs for horizontal mounting |
|
2 |
Illuminated LEDs with vertical mounting |
|
3 |
dimly lit: low battery indicator |
Luminaire behavior
All 4 light strips light up when the battery is fully charged.
Connections

|
1 |
Opening for fixing the cover cap |
|
2 |
DC IN +/- 12 V: For cable connection to the e-bike battery |
|
3 |
USB socket for supplied USB-C cable |
|
4 |
Slot for memory card (Micro SD) |
|
5 |
Reset opening |
Technical data
|
Dimensions: |
105 × 33 × 40 mm |
|
Weight: |
160 g |
|
Camera: |
Full HD |
|
Memory: |
32 GB |
|
Connectivity: |
W-LAN |
|
Radio frequencies: |
2402-2480 MHz: 17.56 dBm |
|
Interfaces: |
USB-C |
|
Ambienttemperature: |
-10...50 °C |
|
Protection class: |
IP 55 and IP 57 |
* 16 GB to max. 512 GB, recommended card standard for the camera function: at least UHS U3
Installing the RS-1000
|
|
|
The RS-1000 can come loose if installed incorrectly.
Danger to life!
Install the RS-1000 according to these instructions.
|
|
Charge before installation
If the RS-1000 is not supplied with power from an e-bike battery, you must charge it before mounting.
The LEDs indicate the fill level: At the start of charging, the first light strip flashes. As charging progresses, the other light strips flash one after the other. When fully charged, all 4 light strips light up continuously.
The battery power is sufficient for at least 2 hours of use.
Select mounting type and location
The diameter of the mounting rods can be 25 to 32 mm.
Mount with bracket
The rotating frame (3) in the rotating frame holder (2) has two screws (1, 4).

- thinrubber adapter(1) for a bar witha diameterof 30-32 mm,
- thickrubber adapter(2) for a bar witha diameter of26-28 mm.


If the RS-1000 is not vertical to the road, correct the angle setting as follows:

The RS-1000 can now be rotated using the hinge (1).
Mounting without bracket
You can mount the RS-1000 directly on a standard luggage rack mount without a bracket. The 4 mm screws for attaching the adapter plate (see p. 11) can be used for this, provided they are long enough.

Connect cable (e-bikes only)
Operate and maintain
Switching on and off
When connected to an e-bike battery, the RS-1000 switches itself on.
To switch on without the e-bike battery, press the button (1) for approx. 3 seconds.
Switch-on process: The RS-1000 starts up. All light strips light up. After approx. 1 minute, the light strip currently at the bottom goes out.
The RS-1000 is ready for operation.
|
 |
The RS-1000 switches off after a few minutes in standby mode.
When connected to an e-bike battery, the RS-1000 switches itself on.
The RS-1000 switches off after a few minutes in standby mode.
Perform a reset
The reset opening is located under the cover cap.
Maintain RS-1000
The RS-1000 is maintenance-free.
Waste disposal
The packaging is made of paper.
 | Dispose of the RS-1000 in accordance with the regulations for electrical waste applicable at the place of use.
|